Tagged: how-to
How to Build a Killer Digital Marketing Strategy
- by Alyson Shane
We live in tumultuous digital times, my friends. New social networks seem to be appearing every day, and if you're trying to promote your business online, it's easy to feel like there are too many options to choose from.
Most clients I talk to when we first meet have an ad-hoc strategy when it comes to promoting themselves online; they know of a few social networks and have accounts set up, but in many cases their messaging is muddled, unclear, and in many instances they are trying to reach an audience who simply aren't there.
That's why developing a digital marketing strategy is so important. Having a strategy which has taken into consideration both your brand's needs and those of your audience and customers can make or break your marketing efforts, so today let's go over some steps to build a badass digital marketing strategy to help you stand out online:
Determine your goals
The first thing I ask a prospective client is: what do you want your digital marketing strategy to accomplish? Many people have never thought about this before, and if you haven't until just now, that's okay! But now is the time to start thinking about what all the time and effort is going to do for you.
When I was in university, I took a few business courses where I learned about two crucial acronyms for planning that I still use every day: SWOT and SMART.
SWOT stands for Strengths, Weaknesses, Opportunities, and Threats, and is helpful when planning a project or new business venture so you can assess (you guessed it) your strengths and shortcomings before moving forward.
SMART stands for Specific, Measurable, Attainable, Realistic, and Timely. When planning out your goals for your digital marketing strategy, make sure that they all meet this set of criteria. What do you want to accomplish and how will you measure it? What are realistic and attainable goals to aim for?
Understanding your SWOT and SMART goals will help direct your time and energy, so you don't waste time floundering around, trying this or that, instead of having a focused and easy-to-understand set of goals.
Ask "Why me?"
What I mean by this is: ask yourself why your business exists.
What does your organization (or your small business) do that makes you worth working with? Are you a Twitter whiz? Do you write fantastic, eye-catching copy? Are your presentation and PowerPoint (or Keynote) skills second-to-none? How do your skills and your personality set your business apart from your competition?
This may take some digging and soul-searching, and that's okay! Many of us (myself included) have had to take a hard, critical look at our business and suss out what makes us unique, and how we can convey that to our audience and potential customers.
Tell your story
Crafting a narrative about your brand is one of the most important things you can do online. Your story -what makes you unique, different, and perfectly posed to solve your customer's problems - is what sets you apart from your competition.
Humans are natural storytellers, and people will be attracted to and remember a brand whose story made them feel something. Positive feelings also lead to feelings of trust, comfort, and help shape your brand's identity not just as a company, but as somewhere where real, dedicated people work and put their energy into.
(Want more info on brand storytelling? Check out my post Marketing Your Brand Through Storytelling)
Build your buyer personas
A buyer persona is exactly what it sounds like: a fake profile of the kinds of people you want to attract and engage with online.
A complete persona should have details about the person's background (I like to name my buyers, too), what they do for a living, what their values and beliefs are, what they like and don't like, and what motivates their decision-making process.
Developing buyer personas is one of the most important steps you can take as part of your digital marketing strategy because it gives you a deeper insight into what your ideal customers are looking for online. This information will inform the kind of things you say, what you share, and the people you connect with online.
Identify where your audience will be
This is critical to implementing a successful digital strategy because if you don't take the time to figure out where your target audience is hanging out online, then you'll never be able to reach them and show them how awesome you are.
That's why doing a buyer persona is so important: it doesn't just inform what to say and how to say it, but also where you should be saying it for maximum impact. For example, if your target audience are Etsy obsessed DIYers who love Pinterest, spending all your time marketing on LinkedIn, which is a business networking site, isn't going to help you find your audience anytime soon.
Take time to think about where your ideal customers will be spending their time thinking about the things that interest them online, and how you can make yourself stand out so they notice you.
Track your success & pivot when necessary
Social networks change over time, so it's important to keep an eye on how successful your digital strategy is, and to fine-tune as you go along. Paying attention to the statistics of each social media account (and your website, if you're blogging, too) can go a long way towards informing what kind of content is resonating your audience, and which turned out to be rather lackluster.
What's wonderful about digital marketing is that unless you really screw up, your audience will usually forgive and forget about a post that didn't catch their eye, or a tweet that didn't go as viral as you hoped. This means you can experiment with different kinds of images, polls, contests, and more! Just track how successful each one was and try to duplicate the ones that did well.
Ask for help (if you need it)
Developing a robust digital strategy can be challenging and time-consuming, and even when brands and businesses have buyer personas they often can't (or don't want to) spend the time reaching out to them and connecting.
That's totally okay! You are not a machine designed for selling and promoting, and if you feel overwhelmed at the thought of having to run your business and develop and implement a digital marketing strategy, that's normal.
Many people choose to work with business consultants, who can help you determine the right direction for your company and develop a killer digital strategy to go along with it (I recommend Kyla Roma if you're in the market for someone; she's fabulous). There are also people like me who offer content management services to help keep you on track (shameless plug, haha).
There's no shame in asking for help, so if you're feeling baffled or overwhelmed make a point to reach out to someone and get the ball rolling on developing and implementing your shiny, new digital marketing strategy!
Do you have any questions about digital marketing? Do you want to know more about how to implement a killer online strategy? I'd love to know!
4 Easy Ways to Reduce Your Blog Bounce Rate
- by Alyson Shane
Whether you blog for yourself, your business, or your employer, minimizing your blog's bounce rate should be a top priority. Readers who click on your site are much more likely to come back than the ones who don't, so managing your bounce rate can go a long way towards building your audience.
If you haven't heard this term before, your blog's bounce rate is the percentage of visitors who arrive on your site, stay on one page, and then leave without clicking around.
This might not seem like a big deal - after all, if they clicked on a link you shared to get to your site, then didn't you accomplish your goal? Well... sort of.
Why is your bounce rate important?
If you run a blog simply for the sake of writing about your life or your interests, then maybe your bounce rate isn't that important to you.
But if you're anything like the millions of bloggers, artists & creatives, and businesses who feature a blog as a single section of a website designed to sell a product or service, then making sure that your site aims to encourage users to explore your site should be a top priority. You don't want them to visit your blog without looking at everything else that you have to offer, do you?
What is a "good" bounce rate?
According to this article, most websites will see bounce rates fall somewhere between 26% and 70%, so as long as you fall within that range, depending on what you do and the purpose of your website, you should be okay.
The same article cautions that a bounce rate below 20% or over 90% is usually a bad sign. The former hints at a problem with the analytics setup, the latter with the website. If you've never taken a look at your bounce rate before, you can find it in Google Analytics (which you should have installed!)
How can you reduce your bounce rate?
I'm glad you asked! It's not as difficult as it may seem, and with a few tweaks and adjustments, your blog will soon be converting like crazy.
Below are four easy ways to spruce up your blog, make it visiting better experience for your audience, and to reduce that bounce rate:

1. Improve your site's speed
Sites that load slowly are my biggest pet peeve! There's nothing worse than waiting for a website to load, or (even worse) try to navigate one which keeps refreshing because the image files take longer to load than the text (I'm looking at you, every single Huffington Post article).
If you're like me the most likely culprit is huge image files or lots of videos; I just did a speed check and managed to get my speed up by 60% by resizing just three photos. Oops. Now my website loads faster than 79% of all tested websites on pingdom.com.
Want to see how quickly your site loads? Punch your URL in here and take a look!
2. Use a clean, easy-to-navigate design
Remember when the internet looked like this?
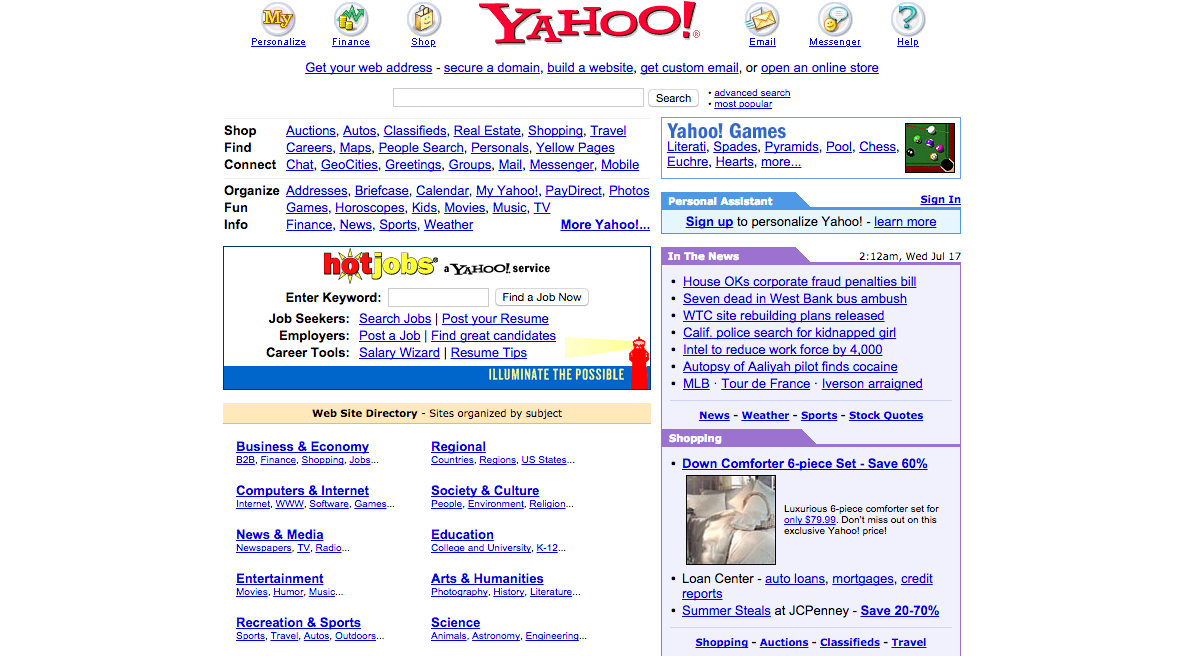
My eyes.
Unfortunately, many websites still look a lot like this, with people trying to cram too much information onto a page at once, providing a visually unappealing and difficult to navigate and read experience for a first-time visitor.
Your website should be designed to move your readers on a journey through your site (generally called a "sales tunnel" but the same idea applies whether you're selling something or not), from the first post they read to other important areas, such as your newsletter signup page, contact form, or online store. If you're struggling to cut back on the content on your page, make a list of the most important parts of your site (e.g., your blog, your About page, your services page, etc.) and try to remove links that don't lead visitors to those areas.
Also, this should also go without saying, but you should also make sure that your site is mobile responsive (aka that it resizes to fit the width of the screen on a mobile phone). Trying to read and navigate a website which hasn't been optimized on mobile screens is a nightmare, and is one of the easiest ways to make sure that first-time visitors to your blog never come back.
3. Keep your content relevant to visitor's needs
What do you blog about? Take a look at the posts you've written recently, and then take a look at your Google Analytics. Are the search terms that are leading people to your website the same ones that you're writing about? If not, then it's time to start honing your content strategy, and then to start paying attention to how you use your headings and subheadings.
Not only does using proper headings and subheadings make your posts easy to read and understand, but it also helps boost your search engine rankings. This is because sites like Google pull information about your page based on what's in your H1, H2, H3, etc., and will help make sure that the people arriving at your site are coming there for the information that you're providing.
4. Link to related posts
One of the easiest ways to reduce your bounce rate is to offer your readers with more to do on your site once they've finished reading. Most bloggers (myself included) just add a footer to the bottom of our posts which recommend posts in the same or similar categories. Adding this at the end of a post is an easy way to entice your new visitor to explore more of what you have to say.
In addition to the footer trick, I also organize my posts into categories so my readers can quickly browse all of the posts I've written on a single topic.They can also browse posts by category and by month and year, and see a list of the most recent posts I've published on the right-hand sidebar.
Try experimenting with your layout and see how you can entice your visitors into exploring of your blog content!
That's it!
By making these changes we've not only managed to increase your blog's look, feel, and navigation, but we've also made sure that your visitors who care about your content can find you, and that your site's slow response time doesn't drive them away before they get through the first paragraph of your latest post.
Have you had issues with high bounce rates? If so, how did you solve them? I'd love to know!
How to Take a Real Vacation While Running Your Own Business
- by Alyson Shane
With my Central American vacation extravaganza coming up tomorrow (gulp!) , I've been experiencing a higher than usual degree of anxiety around my business. This will be the first time that I'll really be "away" from my work in any real capacity, and I'm starting to realize why only 9% of the 200 business owners interviewed in a survey by OnDeck allowed themselves to take a full two-week vacatio.
This is really distressing news! Relaxing and taking a break is crucial to being productive and happy, and it provides much-needed downtime away from all the screens and stresses of everyday life. Even better, with recent advances in technology business owners can work from virtually anywhere, meaning that they can check in and give themselves peace of mind that their hard work isn't crumbling to pieces while they're on the beach.
However, in order to go away on a vacation and not lose your mind, there are a few steps that you can take to help alleviate anxiety and keep things running properly while you're away. Here are some which have helped me:

1. Have someone you trust step in for you
If you manage a business with a few employees, then speak to one of them about handling some of your more pressing duties. Having someone that you trust, whom you know can handle themselves in a crisis and won't burn your business to the (figurative) ground will go a long way towards making sure you aren't stressing out the entire time you're gone.
In my case, I'm getting someone I trust to handle my client's accounts while I'm away. I've planned out as much content in advance as I can, and made my clients aware of a very strict cutoff date for info pertaining to pressing ads and marketing campaigns, so that way all that person has to do is a bit of community management (ie: replying to Tweets and comments as needed).
2. Communicate your expectations
If you run a service-based business like I do, communication is key. This is great day-to-day advice, but is especially applicable when you're about to go away on vacation. Keeping your clients or customers in the loop goes a long way towards building trusting relationships, and helps set their expectations as to what you can reasonably do while you're away.
To illustrate: last week after the holidays ended I sent all of my clients an email with a friendly post-holiday message, and a reminder that I'm going out of town. Now they know the exact dates I'm leaving and returning, as well as the final submission date for any content they need created or scheduled. I also asked them to think of any upcoming events or promotional opportunities, and to let me know ASAP so I that I can plan ahead to make sure nothing gets missed.
I also let them know that, while I will be checking my email from time to time, I'll be in the jungles (or beaches!) of Central America and have no idea what the wifi will be like, so it may take me a few days to respond. By communicating expectations in advance, both parties know what to expect.
If you have employees, make them aware of what you expect them to do while you're away. Having a checklist or defined list of tasks and goals can go a long way towards helping them stay motivated in your absence, and defines clear expectations so there's no confusion.
3. Set boundaries
The point of a vacation is to peel yourself away from your screen.
As someone who literally makes their living online, I know that I'm going to struggle to not keep my face buried in my iPhone screen the entire time, and honestly this is giving me some anxiety.
I'm lucky that a lot of the places we're going will probably have pretty slow, spotty wifi, which will help force me off my phone, but if you're going somewhere with a strong connection, like a resort or somewhere that isn't in the middle of the Guatemalan jungle, then setting rules like "I only check my email in the morning over coffee" can go a long way to keeping you sane.
Not just that, but having a rule for when you "check in" can also help your clients and employees (if you have them) know when to expect to hear from you, and when the best time to get in touch with you will be.
4. Use collaboration tools & group chats
There are a variety of collaboration tools online such as Slack, Asana, Evernote, BaseCamp, and Trello (my personal fave) which you can use to stay in the loop about various projects and opportunities. By making the most of these tools you can communicate and catch up with your team or clients quickly and effectively, leaving more time to hang out and relax.
In the event of a crisis, tools like Google Hangouts and Skype are great for having a quick chat to solve the problem. This can work great for employees who are stressed out during a crisis, or a client who is having a meltdown while you're on another continent.
How do you keep from going crazy when you go away on vacation? Tell me in the comments!
Your Guide to Being Productive as Hell + a Free Daily & Weekly Planner!
- by Alyson Shane
It's the dead of winter here on the prairies, which means that lately I've been waking up to dark skies, chilly mornings, and basically battling the near-overwhelming urge to stay in bed like a big cinnamon bun.

The summer months are my "power months." I find that, especially around this time of year as things get colder and darker, my productivity levels tend to drop. I feel much less inclined to sit at my desk and power through work, and my motivation tends to dip significantly.
Back when I worked in an office there were systems in place to keep employees motivated and on-track, which helped tremendously, but now that I run my own business I need spend the time to develop systems that fit my needs and help keep my motivated and productive.
That's what this post is about: productivity, getting shit done, and staying motivated.

Some insight: what my days look like
Before I go too deep into what to do, let's take a quick look at what my day looks like, and how I make major dents in my to-do list every day:
Here's how my day usually looks:
- Wake up around 7, shower, make coffee
- I've recently started imposing a strict "no email" rule until after I get out of the shower. I used to read emails and find myself getting anxious at the time in-between getting ready and responding, and nobody needs that shit first thing in the morning. Now I wake up, shower, and mentally prep myself for my day before I check my emails. I also subscribe to Danielle Laporte's Truthbombs, which help me start every day on a positive, reflective note.
- Hit the gym
- I hit gym 2-3 times a week. I like to go in the mornings because it isn't as busy, and because I'm not a "morning person" I generally don't lose that much time where I would have otherwise been productive. I'm usually home around 9-9:30am.
- Check my email and read, respond to & file emails
- Once John is out the door (or I'm back from the gym, depending on the day) I park myself at my desk with my thermos of coffee and power through my email. Everything is responded to, taken care of, read/deleted, and filed away.
- Check off any "quick tasks"
- The first things I take care of are anything which take 15-20 minutes just to clear my plate. Generally this includes finding relevant content for clients, checking their messages/responding to new comments, reading any articles pertinent to what I'm doing, and scheduling a bit of my own content, too.
- Take care of my "priority tasks" first
- Once all my smaller tasks are complete I get to the most pressing task of the day; you know, the stuff that has a tight deadline that needs to get done. Because I know my productivity increases as the morning goes on, this usually starts around 10am and lasts uninterrupted until 1pm or so.
- Eat lunch and catch up on news
- I'm bad at taking breaks when I get into something, especially writing, but I try to make a point to stop and have a snack or some lunch in the early afternoon. I'll also take this time to read anything I have on the back burner, check Twitter, and walk around the house, harass the cats a bit, and stretch.
- Power through the other two or three "secondary tasks" on my to-do list
- Generally I try to leave really writing-intensive tasks for the afternoon, so most afternoons I spend writing content, working on blog posts for clients, or doing business-related projects.
- Set up my to-do list for the following day
- The last thing I do every day is review and write out my to-do list for the next day. That way I can sit down in the morning and see what my purpose-driven mind prioritized the day before.

On any given day I work between 6-8 hours, though there are of course times when I go over, like if a client needs me to attend an event for them, or if there's a large project with a tight deadline. Sometimes, too, I just want to keep working, so I do!
I find that the days that I go to the gym are generally my most productive days. I that that this is because I'm doing something at the start of my day which requires 100% of my attention and focus, and gets my endorphins going.
Additionally, I definitely have days where I'm working like crazy, responding to a billion emails and phone calls, and spending all of my day doing things outside of my to-do list. That's normal. However, by slowly learning to optimize my time and allowing myself to develop a system that works for me, I can manage my time in a way that allows me to be super-productive without over-working myself and going crazy.
So now that you have a better idea of how I manage my day, it's time to start talking about how you can kick ass, take names, and maximize your productivity!
Track how you spend your time
I use Toggl religiously to help me keep track of where I'm spending my time each week. This goes for client stuff - I'm detailed down to which specific task I'm doing, and for which client - as well as my own business development. It can be hard to track for smaller tasks like responding to tweets or comments that pop up, but I do my best to keep track, and round it all up at the end of the week.
By reviewing my time and where it's going, I can identify things that take me longer than usual (scheduling lots of content in advance, reports, etc) and schedule in "distraction-free" time. I'm pretty good at managing this - usually having a separate window open with just the tabs I need to complete a specific task work for me, but if you need you can use products like StaFocused and Anti-Social.
Use the alarms in your calendar
I schedule everything into my iCalendar, and rely heavily on alarms which I set 20-30 minutes before I have to leave/be somewhere so that I can work uninterrupted, and actually focus on what I'm doing, rather than constantly checking the clock to make sure I'm not late.
I also use this to keep track of things like Twitter chats and Skype and phone calls, meaning I always know when a client is going to call, or when I need to be ready to moderate or participate in a chat. This means I can focus, distraction-free, on my work until right before I need to switch focus.
Set realistic expectations
This relates to my earlier point about tracking your time: understanding how much you can reasonably get done in a day, and letting go of the expectation that you have to be blindingly busy 100% of the time, can make a huge different not only in your happiness level, but also impact how productive you are. Worrying about being productive can actually make you less so because anxiety is disruptive and distracting.
With this in mind, take the time to track how much time it takes to do a specific task (eg: I know that a post of this size takes me about two hours to write/edit, not including finding and creating images) and organize your week accordingly.
Personally, I try to heap as much stuff on Tuesdays - Thursdays as possible, so that I can coast in and out of my week with smaller projects, follow-ups and the like. Plus, it's really hard to stay focused on a Friday afternoon when you work from home, you guys.
Treat yo' self
No matter what your job is I can pretty much guarantee that there's something about it that doesn't dazzle your senses. Whether it's writing reports, responding to emails, debugging a program... whatever, there's likely something that makes you feel less than stellar while doing it.
If you can't outsource it or get it off your plate, then I've found that the best way to motivate yourself to get it the hell done and off your plate is: rewarding yourself for your hard work, of course!
Basically you do this: "if I complete ______ (blog content, brand audit, etc) then I can _______ (watch the latest American Horror Story, have a glass of wine, go for a walk)."
I make a deal with myself in order to light a fire under my own ass and motivate myself to get it done, so that I can move on to the more appealing things I'd rather be spending my time doing.
Use weekly and monthly planners
Currently I'm using my iCalendar to keep track of all of my business and personal stuff - be that blog content, client deadlines, meetings, the #SocialHour Twitter chat, newsletters to send out... whatever I have coming up, it's in my calendar.
Sometimes it can be overwhelming to look at, but it means that I never miss a deadline, and I know exactly what I need to get done each day/week/month. However, if you find looking at a monthly calendar to be overwhelming (as I do) having daily and weekly checklists and to-do lists can go a long way in helping you stay on top of everything that you need to get done.
Want to get started on your organization and mega-productivity journey? No problem! When you sign up for my newsletter I'll send you an editable PDF Daily and Weekly Planner for you to save on your desktop and use every day, or (my favourite) print it off, laminate that SOB, and use cute markers to cross off those to-dos.
3 Things to do Before Breaking Out on Your Own
- by Alyson Shane
Well, I made it.
It's 2016, my business hasn't fallen apart, and my life didn't somehow implode in on itself. Yay!
Without a doubt, starting my own business and making the transition from being a full-time employee to a full-time business owner was scary as hell. There isn't really a "right" way to make the jump, and there aren't really a specific set of steps that you absolutely 100% must take in order to do it. However, there are a few key things to keep in mind before you break out on your own, which I want to discuss in this post.
Why do I want to talk about this stuff? Because sharing is caring, and because I was lucky enough to have a wonderful and very clever guide (my boyfriend, John) who helped me navigate a lot of hurdles and helped me prepare for this experience.
Not everyone starting their own business is fortunate enough to have a John in their life, so here are a few things he taught me which I think will help you out if you think that running your own business is the path that you want to take:
1. Start Hustling Early
I got my first client a full year before I started working for myself full-time. Honestly, it happened by accident (I met a guy I knew from Twitter at a party who introduced me to his friend who needed a copywriter) and it wasn't for much, just a few copywriting articles each month. It didn't make a lot of money off that first client, but the experience of working with someone for a while helped me start to understand the dynamic of different kinds of working relationships which were different than the boss/employee relationship I was used to.
Also, starting small has allowed me to scale my business in a manageable way. I've acquired a handful of regular clients who I work with on a monthly basis, as well as some copywriting work, and one-off contracts for special events or websites as they come up.
I should also point out that I have been extremely lucky. What happened to me isn't always the case, and it's not realistic to assume that just because you go into business for yourself, that clients will start pouring out of the woodwork right away.
Not just that, but securing an ongoing contract (if that's what you're looking for, some businesses operate on a per-contract basis) often takes time. The process from the initial email or meeting to signing a contract can take months to happen, or never materialize at all.
By starting to build a client base early, you can get a feel for whether or not running your own business is actually what you want to do before you jump feet-first into doing it. Also, leaving your secure 9-5 knowing that you already have a handful of contracts to take care of your living expenses goes a long way in helping make the transition less scary. Trust me on this one.
2. Buckle Down
Assuming that you're working a 9-5 job in addition to building your business, you're going to be insanely busy trying to juggle both before breaking out on your own. Get used to it.

Before I left my office job I was working most weeknight evenings from 6-11 or 12, and spending a lot of time working on the weekends, as well. If you're trying to build up a decent client base to help you make a smooth transition, then obviously any time spent doing that work needs to be done outside of regular office hours (unless your boss is cool with this, which most aren't.)
If you want to work for yourself, you need to get ready for a very imbalanced work/life lifestyle for a while. Not just before you leave your 9-5, but afterward, too. To illustrate: I'm writing this on a Sunday evening, after working all day since I got up. I've also been on "holiday" since Christmas Eve, but have spent at least 5 days of my 10-day 'holiday' working for the majority of the day (who told you that running your own business was glamorous?)
What's crazy is that what I just illustrated isn't that uncommon; lots of people I know work even more than I do! But when you run your own business you're the only person responsible for generating your own income, and the sooner you get used to working aggressive and unusual hours, the better.
3. Save Up
Without a doubt the most terrifying thing about working for yourself is the transition from going to having a regular paycheque which is deposited into your bank account every two weeks, to one where your financial situation is in a state of flux.
I try not to talk too much about my financial situation, but in the interest of learning from my experience, here's how I managed to get myself into a relatively good position:
When I got my first contract (the small copywriting one I mentioned earlier) I used it to start paying down my credit card debt and the student debt that I'd acquired while in university. As I picked up more clients and started to think more seriously about running my own business as an option, I started splitting my additional income (ie: the money I was making above what I was paid at my office job) between paying down my debt and putting it aside in a nest egg.
Having a nest egg allows me to not freak the hell out when a payment is late (which happens) because I still have a float to live on for a while. Honestly, this "float" is the key to running your own business and not being in a constant state of panic. This all changes when you start bringing subcontractors and employees into the mix, of course, because they have to be paid before you do, but that's a whole different kettle of fish (and anxiety) that we won't go into here.
One last thing about money: get your taxes in order. If you live in Canada and you run a business making over $30,000/yr you must register for a General Sales Tax (GST) number. Dealing with the Canada Revenue Agency is a hassle (believe me) but if you aren't filing your taxes correctly you can wind up owing tens of thousands of dollars. Speak to your bank or accountant, if you've got one, and make sure you're covered.
Do you have any tips for people thinking about breaking out on their own? Tell me in the comments!
How to Create an Eye-Catching Media Kit
- by Alyson Shane
One of the easiest ways to set yourself apart from your competition and impress prospective clients and customers is by having a strong media kit.
A media kit is essentially a tszujed-up version of a traditional resume, except without all the boring stuff. Instead of a lame-looking page listing some roles you had at old jobs, a media kit is a way for you to present what your brand is all about. It's designed to share your story, your services, how you help your customers and clients, samples of your work, testimonials, and businesses you've helped succeed or collaborated with.
In this post, I'll walk you through an in-depth explanation of what a media kit is, why you should use one, and how you can create one that helps your brand stand out from the rest.
What is a Media Kit?
A media kit is a collection of information about your brand which helps potential customers and clients understand who your brand is, what you do, and what makes you different than your competitors. A media kit can come in variety of flavours, but since I use (and have experience creating) print PDF media kits, this style is the one that I'll focus on in this post.
Basically a PDF media kit looks little a booklet, with a cover page, index (if necessary), and sections breaking dedicated to different topics. The core of your PDF media kit should be a description of your brand and your values, bios of you and your team (if you have a team), your services, and some supporting stuff (testimonials, case studies, etc) that backs up how awesome the rest of your media kit says you are.
Why Do You Need a Media Kit?
A media kit makes you seem more professional. The fact that you've clearly put the time and effort into producing something which effectively conveys your brand, your values, and what you do shows that you've actually thought this shit out.
The idea of a good media kit is that it introduces your brand better than you can. Unless you're a master speaker who carries a Keynote presentation around in your pocket, a PDF with choice words and eye-catching visuals can easily summarize what you do and give potential clients an overview of your company much easier than you can.
Creating an Eye-Catching Media Kit
How your media kit looks is just as important as what's inside. If your media kit looks like you printed it out at a Staples using the black and white printer on the way to the meeting, nobody's going to take you seriously.
Here are some things to keep in mind to create a concise, clever, and cute (okay, maybe not cute but I like alliterations) media kit which will blow your competition out of the water:
- Avoid blocks of text whenever possible - bullet points are your friend!
- Keep it short. 3-10 pages is ideal for keeping someone's attention.
- Be consistent. Use the same colours, font and branding that's on your website and business cards.
- Don't use more than two fonts. If you can match them to the ones on your website/cards, even better.
- Use images whenever possible; people's eyes start to glaze over and this helps break things up.
- Never misrepresent information or work you've done.
- Update it as necessary. Taking the time to keep it updated shows you're serious about acquiring new business.
What to Include in Your Media Kit
Basically you want to start with the most basic information as possible, and build on it from there to things which get more specific and particular to your industry. Below is a rough outline of the things that you should include, or should consider including, in your media kit.
Remember, these are unique packages which should convey who you are. If any of these things below seem weird, or not like a fit with your business or how you want to present yourself, then feel free to nix them as needed.
1. Who You Are
This section is designed to, obviously, introduce you, your brand, and your team. It should include:
- Your logo and branding.
- An About section. Introduce your brand, how it got started, your primary market, and what motivates you to do the work that you do.
- 'Who I Am' or 'Meet the Team' section with head shots and short bios. Bios can include experience, skills, knowledge, and what each team member contributes, if needed.
- Your target market. Take a moment to describe the kinds of businesses and brands you work with, and in which fields.
2. Your Services
This section is pretty straightforward. List the kinds of services you offer, and provide examples if possible. What's great about this section is that it allows you to define what you want to do, not the other way around. This is how a media kit is different on a resume: on a resume you're basically trying to state a variety of stuff you think people will want to hire you for, whereas a media kit, though intended for the same purpose, doesn't require you to offer up a service you don't want to do, or aren't skilled at doing.
Below is a copy/paste from the Work With Me section on my website. Basically my media kit has a similar iteration to this:
Some Ways That I Can Help You
I'll start by asking questions and help you figure out:
- Who and where are your audience?
- What are their needs and how can you help fulfill them?
- What is your brand message?
- How can we convey this clearly and simply across multiple online platforms?
- Which platforms will help you create a community around your brand?
3. Pricing
This is totally optional.
If your pricing varies from project to project (as mine does) then it may not be advantageous to include a pricing sheet. Personally, because of the amount of setup and customization involved with managing a content strategy across a variety of platforms, I prefer to quote projects on an individual basis.
However, if you're comfortable with sharing your rates from the get-go, or do work which can be easily billed hourly (like graphic design, for example), feel free to include this section in your media kit.
4. Portfolio
If you've been in business for a while, it's often helpful to include other examples of work you've done for past or current clients. This can include case studies, examples of work you've done, or even a list of logos from brands and businesses who have worked with you in the past.
Photographs work wonders in this section, so if you're able to show examples of what you do in screenshots, beautiful images, or in infographs, this is the place to showcase it.

5. Accomplishments
This is also the area where you can share other successes and accomplishments which give your brand more credibility. Some good examples of accomplishments to include are:
- Conferences who have invited you to speak
- Interviews you've done
- Articles published about you
- Websites or sources who have republished, re-shared, or references your work
- Awards you may have received
- etc
6. Testimonials
This goes without saying, but having a strong testimonial's page can go a long way to adding to your credibility. A testimonial from a customer is basically them saying: this person/brand did a good enough job on the work they did you us that I'll put my name behind supporting them in their future endeavours.
7. Policies
This is another area which you can either include, or not. Conventional wisdom (aka a lot of sites I looked at back when I was building my media kit) suggest it, but to be honest I don't prefer to get into stuff like specific policies until a prospective client and I are ready to sign a contract.
This is just personal preference, but bringing legalese and policies in at a very early stage doesn't give me the warm fuzzies about working with someone. I prefer to discuss things first, and then finalize them in the contract before we begin working. Again, this is just personal preference!
Make it Personal
The most important thing about your media kit is you. The whole purpose of this lovely, slightly stress-inducing to create little package is to convey you and your brand in all you glory, so make sure to include a little bit of sass or personality in there somewhere. People want to feel like they're putting their faith (and funds!) in real, down-to-earth professional people, not weird robots who take themselves too seriously.
Media Kit Template Resources
I created a custom media kit for myself using Pages, but if you're not a super-creative type, or the idea of dragging boxes around and aligning text sounds dreadful, check out a few websites offering inexpensive (or free!), trendy AF media kit templates:
- Turner Media Kit Template via HipMediaKits
- Media Kit Template via FoodBloggersCentral
- Media Kit Template via LifeYourWay
- The Minimalist Media Kit via ZaniFest
- The Brand Magnet Media Kit Template
Was this instructional helpful? Let me know me in the comments!
How to Work From Home & Not Go Crazy
- by Alyson Shane
Last week, after nearly 6 months of working from home, it finally happened: I got lonely. Not just any kind of lonely, though, this was "it's Tuesday and I haven't left the house or talked to the outside world since Sunday" kind of lonely. I started to feel anxious, crazy, and totally disconnected from the outside world.
As someone who has worked in an office for the majority of their adult life, working from home has taken some getting used to. Don't get me wrong, the perks are endless: I can wake up when I want, I can go for lunch or coffee with a colleague and not worry about being back "in time", and I can plan my workdays around when I'm my most productive and not when a boss expects me to be.
However, it does get super lonely. Hanging around the house all day with these two weirdos is awesome, but it's weird how much you begin to miss that water cooler chit-chat, and how much effort actually has to go into making sure you don't drive yourself stir-crazy.
Get Dressed
Getting dressed is the difference between a "lazy Saturday in front of my laptop" and "I'm getting actual work done" mode. it might sound crazy, but stick with me here, there's some important reasons why this is actually a helpful and totally legitimate practice:
Clothes are symbolic, and affect how we feel about ourselves. When you put in the time to make yourself look nice you're more motivated to "get out there" and hustle, whether that means meeting a client, going somewhere, or even talking on the phone. In addition to that, getting dressed helps subconsciously compartmentalize areas of your life that can begin to blend together when you work from home.
Besides the mental difference between hanging out in your PJs and getting dressed, being fully dressed and ready to head out the door means that you can do exactly that - I can pop out to the store, to grab a coffee, or to go sit somewhere and work if I feel like it.
Personal aside: I have "power lipstick" that I put on before an important client call. I know it's silly, but wearing it makes me feel like a bombshell badass à la Meryl Streep in The Devil Wears Prada and definitely makes me feel more powerful and assertive.

Keep Your Work Area Separate
Disengaging from work mode into relaxing mode is way harder when you do both in the same space.
Currently I do all of my "office" work at my iMac, at a desk, in a computer chair, and try to relegate "downtime" (aka hanging out on social networks, reading for leisure, and writing) to sitting on the couch with my Macbook. Sometimes these lines blur - I'll work on my eBook from the couch, or write a blog post at my desk (like I'm doing now) by and large my 9-5 type work takes place at a separate area than my leisure time.
My guess is that it's a mental thing, but sitting on my super-comfortable couch with my feet up makes me feel less like I'm working... so I work less. I spend way more time slacking off if I try to work from the couch than if I'm art my desk. Additionally, I can "leave work" for the day by putting my iMac to sleep and shutting off my desk lamp - those are symbolic gestures that, for me, signal the end of my workday and a transition to hanging out and relaxing.
Figure Out When You're Most Productive
One of the biggest changes from going to working in an office to working at home is that you don't have to worry about being "on" all the time. What I mean by that is, you don't have to worry about looking busy 24/7 just in case your boss happens to walk by and see your screen. According to a salary.com article from 2014, 89% of employees say they "waste time" at work - whether that's checking their email, hanging out on Facebook, or loitering around the coffee machine; they're not sitting at their desks and being productive.
But what does "productivity" mean? For most employers, it means that you're plugging away at a task and that you're operating at the highest efficiency levels from the moment you arrive to the moment you leave the office. Realtalk: this just isn't the reality, and sitting at your desk and forcing yourself to try and operate at maximum efficiency all day is a surefire way to get next to nothing done.
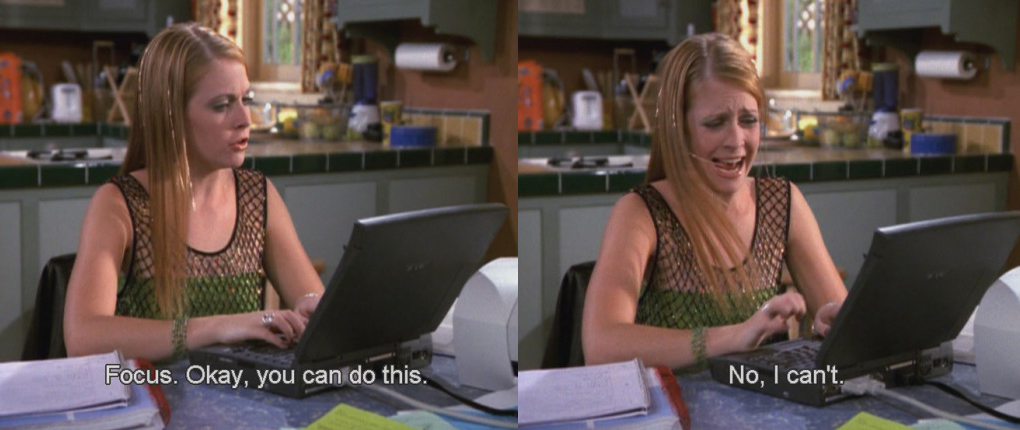
One of the great things about working from home is that you can set your own schedule according to when you're most productive, rather than trying to be productive all day (which rarely happens with any real level of consistency - we all need breaks, after all).
I know that I'm most productive early in the morning (8-11ish) and late in the afternoon (3-6ish), with a lull in-between most days, so I tackle my most pressing and important tasks during those two times - usually I try to handle client stuff in the AM, and do business development stuff (blogging, writing my ebook, etc) in the afternoon. That way I know I can get the most out of my day, and by having a little downtime I can make sure when I'm productive I'm as focused as possible.
Declutter Your Desk
Clutter is the enemy of productivity, and if you have to spend a ton of time searching through papers, looking for a pen that works, or rooting through old notes and files you're distracting yourself from what you should actually be focusing on: being productive.
I'm a bit of a cleanliness nut, so here's how I keep my desk organized and in a state of zen during the week:
- I only use one pen at a time. Actually, I rely pretty heavily on mechanical pencils, but I have a little box that I got from Magic Pony several years ago where all my pens and pencils live.
- Do a paper purge. I try to keep my desk as paper-free as possible, which means rounding up notes, papers, and receipts and putting them away. Additionally, if you want to claim something on a receipt as a business expense take a photo before you put it away. I do this weekly and it saves me so much hassle.
- Purge your desktop. Put unused files or photos in the trash bin and try to keep your computer desktop as clutter-free as possible. I generally only have my notebook, a pencil, and my phone on my desk when I'm working.
Find Reasons to Leave the House
This is a huge one, kids. It's way too easy to wake up, work, hang out, go to sleep, wake up, work, hang out, go to sleep, wake up... you get my drift. Especially during the winter months when sitting outside on the deck isn't an option it can be all too easy to wind up staying inside for days at a time, ordering all your meals in from SkiptheDishes and being glued to the computer screen.
Personally, I combat this by hitting the gym on a regular basis, which gets me out of the house, on the bus, and interacting with other human beings 3-4 times a week. Usually I'll stop by the grocery store on the way home for a little more face time with people aren't my boyfriend or my roommate or his girlfriend.
Don't Work in Bed
This should be self-explanatory, but just in case: don't bring your work into the same place where you sleep and snuggle up with your lover.
Do you have any tips for staying sane while working from home? I'd love to hear them!
How to Plan & Run a Successful Crowdfunding Campaign (part three)
- by Alyson Shane
Welcome back to the third instalment of the Crowdfunding Crash Course series!
This series of summary posts is designed to go over the lessons learned through more than a dozen interviews with crowdfunders during the course of this project, all with a little bit of insight from myself (of course.)
This instalment will focus on a few things to do after your campaign ends, so let's begin!
Thank Your Backers - No Matter What the Outcome
If your campaign succeeded, congratulations! You kicked some ass, took names, and raised your funding goal. At this point it's crucial to reach out to all of your backers at every level and thank them for contributing to your project and supporting you in your endeavours.
However, if your project was unsuccessful reach out anyway. Be honest with your backers. If you used Indiegogo or a service which allows you to keep the funds you raised, let them know how you plan to spend the money. If you used a service like Kickstarter and you know they'll be getting a refund, reach out and thank them sincerely. If you can, let them know what your next steps are and how they can continue to follow and support your project beyond the campaign.
Remove a Failed Kickstarter Campaign Before It Ends
If you're using Kickstarter and you know a few days before your campaign end date that you're not going to meet your funding goals, shutter your campaign and regroup before it ends. Otherwise you'll be left with a dead, unfinished campaign that will sit on Kickstarter indefinitely.
This was one of the things that Meghan Athavale mentioned in her interview. She said that initially she tried to raise funds using Kickstarter, but didn't plan enough and unfortunately the first time around her team didn't meet their funding goals.
However, what she didn't realize was that she couldn't remove her failed campaign after it ended, which means that when she re-launched an Indiegogo campaign, even though she was significantly more prepared and met her funding goals this time, she still had an old, failed ghost of a campaign out in the ether of the internet. If you think that this is something that could cause issues for you in the future, cut your losses and end your campaign while you still have the chance.
Map It Out!
The overarching theme of this project seems to be plan as much as humanly possible (have you noticed?)
Do-to lists, checklists, all those tools come in handy when planning a campaign of any sort, but the old classic tool is still one of the best: a calendar with all of your important dates, milestones, and reminders plugged into it.
If you're a bit old school like me you might like to physically write things down when you plan, but if you'd like to keep things digital (way easier when working with a team) Indiegogo has a fabulous calendar tool which you can use to plan your campaign well in advance and make sure you don't miss any important dates or milestones.
It's also pretty helpful if you're new to this whole experience and are unsure of when you should be planning each step. Personally I think the timelines are a bit aggressive -I'd give myself a few months to adequately plan, instead of just a few weeks- but that's entirely up to you and how prepared you are!
Learn the Tools of the Trade
This factors into what we talked about in the 2nd recap post, where we discussed the importance of having a game plan to promote your campaign and manage it before you start. Doing your research into the best platforms and tools to help you craft, create, and distribute your message to the masses can make or break your campaign.
Below are a few great resources to get you started:
Video Creation & Editing: iMovie or Stupeflix
Video Hosting: Vimeo or YouTube
Landing Pages: Unbounce
Social Media Management: Hootsuite, Buffer, Crowdbooster, SocialFlow, Sprout Social
Link Shortening: Bit.ly, Snip.ly
Want even more?
I'm thrilled to announce that I'm in the process of putting together The Crowdfunding Crash Course eBook!
As I was putting together this post I found myself having to go back through posts and interviews I'd written, and sift through them to find the information I wanted. It was clunky, confusing at times, and not at all the kind of succinct, awesome experience that I want to provide for all of you.
So, with a very limited knowledge of iBooks Author, I set out on a quest to put together the most complete version of the Crowdfunding Crash Course project to date, all compiled in a handy little book for you to reference and use whenever you need!
The eBook is full of tips, tricks, breakdowns and, of course, the interviews from the Crowdfunding Crash Course Project. In addition to the information already available in post format, I'll be providing a more detailed breakdown and analysis of each campaign, as well as additional insights and advice to prepare for, and manage your campaign after it's ended.
The Crowdfunding Crash Course eBook will be available for free to all of my newsletter subscribers, make sure you sign up to get your hot little hands on one of the first copies!
I'm so excited to be sharing this news with you, and can't wait to get The Crowdfunding Crash Course eBook out there into the big, wide world!
xox
Alyson
How to Plan & Run a Successful Crowdfunding Campaign (part two)
- by Alyson Shane
Welcome back to the second instalment of the Crowdfunding Crash Course recap series!
In this series we'll be covering the lessons that the participants of the Crowdfunding Crash Course project shared with us, all summed up in a few handy posts (with some input from yours truly, of course.)
If you think you have an amazing idea that you have to share with the world, it might seem like crowdfunding is the easiest way to get your message out to a lot of people. Spoiler alert: it isn't. A successful crowdfunding campaign is rarely one that you can "set and forget" and takes about as much planning and preparation as a run-of-the-mill marketing campaign.
Honestly though, I didn't fully grasp any of this until I started this project. This is because a good crowdfunding campaign, like most things that are done well, looks pretty effortless.
This realization is why I decided to start doing recap posts - to help dispel some myths about the process, and to break down the steps to take to make sure that your campaign is every bit as successful as it can be!

Do Your Research
Luckily for us, neither Kickstarter nor Indiegogo, the two most popular crowdfunding platforms, automatically remove campaigns once they've ended. This is great news for you, a budding crowdfunder, because it means that there's a wide variety of projects to explore and research. If you're lucky, there may even be a few similar to what you're planning to do, which can be great opportunities for some research.
For example, if you're planning a crowdfunding campaign to raise money for your nonprofit which will develop a product to be used in developing countries, you'd be doing yourself a disservice if you didn't take a look at the SolarPuff Kickstarter campaign page, and that's just one that we know about! A quick search for "nonprofits" will bring up a variety of campaigns for you to draw inspiration from.
The best part about the fact that all those older campaigns are still out there is that it gives you an idea as to how different campaigns managed to meet their funding goals... or if they didn't.
Some things to check for are:
- The quality and length of of the video
- Message and story
- The strength of the pitch (or the "ask")
- The kinds of perks offered at the start
- If any perks were added any later into the campaign
- If the campaign met it's funding goals (or if it didn't, how close it came)
Crowdfunding, as an industry, is unusually transparent because everything is out there in the open for all to see. Campaigns, by their nature, are public, and the information is there for you to learn from. All you have to do is take the time to do your research!

Pick the Best Platform to Suit You
The two major crowdfunding platforms out there are Kickstarter and Indiegogo, and because the interviews I did for this project happened to all be on either platform, these are the two we'll focus on right now.
Kickstarter is an "all or nothing platform" which means that if you set your crowdfunding goal as $100,00.00 and you only manage to raise $95,000.00, you don't get to keep any of it. In fact, when someone donates to your campaign their credit card isn't charged until your campaign reaches it's goal.
Indiegogo has what's called a "flexible funding system," which means that as backers donate to the campaign, the organizers get that money in real time. It also means that they get to keep the money that's been backed so far, regardless of whether or not you reach your goals. Indiegogo also allows you extend the life of your campaign, and change your funding goals halfway through your campaign.
Kickstarter dwarfs Indiegogo in a few key ways: it attracts more traffic, it features a "Projects We Love" newsletter and feature area on their site which can propel a floundering project well past it's target goal, and it attracts more pledges, and pledges in higher amounts.
However, Indiegogo has it's strengths: it's had almost 100,000 more successfully completed campaigns than Kickstarter; this is because when a campaign is about to expire and hasn't reached it's funding goal, many people pull them from Kickstarter before the end-date.
Ultimately the platform you choose is up to you! Do your research and invest your time in the platform that you think will do the following:
- Allow you to provide the kinds of rewards you'd like
- Has funding options that you're comfortable with
- Provides you with ways to promote your campaign
Work With a Team
One of the striking things about the interviews I did for this project was the sheer amount of man-power that goes into planning, executing, and managing a crowdfunding campaign.
Running a campaign takes a lot of time and effort. You have to plan before your launch, manage the marketing leading up to and during the campaign, communicate with funders, answer questions, and any variety of things that might pop up or be unique to your project.
According to Indiegogo, crowdfunders who worked with teams of three or more raised over three times as many funds as campaigners who chose to go at it alone. This is likely because having more people on your team means you have an extended network of people to share it with, and potential funders!
It never hurts to have each member of your team promoting your campaign on their own individual social media feeds, and to their friends and family; even more incentive to surround yourself with a great team of people to help your campaign be a success!
Communicate Consistently
Nothing makes a backer feel like they wasted their money more than a campaign that goes dark the moment you donate. Besides that, you don't want people to forget about your campaign the second they give you money, do you? Of course not, which is why communicating is so, so important.
One of the most effective things you can do to keep things fresh is to keep updating your campaign page after you launch. This is essential! Regardless of the type of project you're trying to fund, you want to keep your backers in the loop every step away (this plays into what i was saying earlier about crowdfunding being an extremely "transparent" industry).
This means updating your page when you've hit important milestones, have press mentions, or new perks that you've added after the campaign launch (more on that in the next instalment, I promise!).
Updates to your campaign will automatically be emailed to anyone who contributes, making this step a total breeze and the easiest way to communicate with your backers post-launch. It also helps your backers know that you appreciate them and their efforts in helping you succeed.

On average, most crowdfunding campaigns post at least four updates over the course of their campaign, and these posts could cover a wide variety of topics, such as:
- Important funding milestones (30%, 50%, etc)
- New perks and incentives
- Profiles of that terrific team you've put together
- Behind-the-scenes looks at your process, product development, etc
- Press coverage
- and more!
Staying in touch with your backers is key, and can often help put you over the top of your funding goals during those final, stressful days of your campaign. If you send an update to your backers which reads "only $200 to go until we've met our goal!" and that backer is emotionally (and financially, now) invested in seeing your campaign succeed, they're much more likely to forward the email to others and ask friends to donate to that awesome, super-cool campaign, too!
Is That It?
Heck no! There's still more to cover, so make sure you check back to the final instalment of the Crowdfunding Crash Course Recap Series
This post is part of a series. For all of the Crowdfunding Crash Course interviews and summary posts, visit the Projects section of my site!
How to Plan & Run a Successful Crowdfunding Campaign (part one)
- by Alyson Shane
The Crowdfunding Crash Course project has reached it's end. I've interviewed over a dozen crowdfunders about a variety of topics, ranging from art projects, to tech hardware, to books, to board games, music and more.
To say that this has been a learning experience is putting it lightly. I've learned so much over the course of these interviews, and am excited to be able to share what I've learned with you, especially now that the interview portion of the project has reached completion.
Over the next few posts we'll discuss, in-depth, some strategies and steps to take to help you with the following:
- Gauging interest and pre-campaign community-building
- How to stay organized and on track
- Maintaining momentum during your campaign
- Telling an emotionally compelling story
- and more!
Ready? Let's get started!

Build a Community
One of the most common responses that I heard during the course of this project was "build your community first."
While building your community factors into your marketing and outreach, I want to touch on it, separately, because one-time funders might not do much to improve your campaign's visibility. Sure, they may donate and help you reach your funding goal, but if they don't talk to their friends about it or share it on social media, they aren't being as helpful to your campaign as they could be.
Communities form online when like-minded people get together based on a shared goal, vision, or interest. In the case of your campaign, your goal is to create a community of supporters dedicated to seeing your campaign succeed.
This goes beyond your mum, your partner and your best friend. In order to blow past your goals and leave the competition in the dust, you'll have to create an engaging, compelling campaign which mobilizes people to actively support and share it with everyone they know. More on how to do all of this below:
Plan Your Marketing & Outreach
Crowdfunding platforms aren't listing services, and the success and results you'll see will be directly proportional to the amount of time, attention, and planning you put into promoting your campaign elsewhere online.
Meg Athavale, who used Indiegogo to fund the LUMO Interactive Projector, a gaming and display system that includes a projector, a sensor that captures motion data, and an Android processor, used tools like Gleam, Thunderclap, and Facebook ads to raise awareness. She also went "old school" and attended events and conferences where she met potential investors, and secured a spread story in the Canadian newspaper the Globe and Mail, which helped increase awareness.
Some tools to use to keep in mind while planning your campaign's marketing strategy are:
- Hootsuite, Buffer, or a similar content-scheduling app
- Facebook and Twitter Ads
- MailChimp, for newsletters and campaign updates
- Thunderclap, for outreach
- Gleam, to run competitions to raise interest
Focus on the Pitch and Story
Once you get people to your page, the most important part of crowdfunding is your initial pitch, and your message.
It's important to remember the context of crowdfunding: you're competing with countless other crowdfunders on a single website, wether that's Kickstarter, Indiegogo, or whatever platform you're using. You're not just competing against other crowdfunders, but on the internet at large. The only thing stopping potential funders from navigating away from your page is your message.
How can you craft a message that makes people stay? You have to tell a great story. A great story doesn't just tell people what you're doing, it should also tell them how their support helps make a difference. Focusing on appealing to the "why" of your campaign, and engage your funders on an emotional level.
One of my favourite examples of this was SolarPuff: A Unique Little Solar Light. Stacy Kelly, who was interviewed about the project, mentioned that when the Nepal earthquake hit, they were able to integrate the SolarPuff into relief efforts. For Stacy's funders, knowing that their donations were going to develop and distribute a product that would help people in need made them feel good, which helped increase engagement and donations.

Additionally, in the case of SolarPuff the nature of the product -an eco-friendly, reusable, solar-powered light which could be used for emergency relief aid- earned them a spot on Kickstarter's "Projects We Love" list, which skyrocketed their funding thanks to the exposure.
It's unlikely that Kickstarter would have featured the SolarPuff if they didn't have the emotional appeal, strong pitch, and story behind it. Having a product and a story with emotional appeal always helps.
Build An Email List
A strong email list is one of the best and most powerful tools at your disposal to promote your campaign on an ongoing basis, from before it starts to after it's finished. Before your campaign begins, set up a landing page on your site which features a video (more on that below), a call to action, and a field where people can sign up for newsletter updates to the project.
Having an email list is the most effective way marketers have to promote something, because when a person signs up to receive regular updates they're giving you the keys to the most personal place on the internet: their email inbox. You now have a direct line of communication with that person, which they've willingly given to you.
Having email newsletters means that you can communicate on the status of your campaign before it starts, when it's launching, and important milestones and successes as they occur, as well as calls-to-action to donate. A strong email list also is a very good indicator that there's interest in your product and idea, which can be a great way to gauge interest before you begin investing all that time and energy.
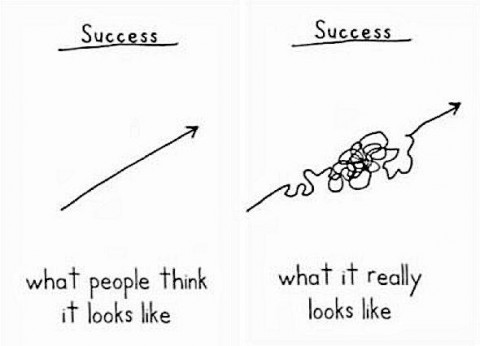
Put Effort Into Your Video
Videos are your best tool to communicate with your audience, and to help them understand your message, goals, and how your campaign will make a difference in their lives. Your video is the single best tool at your disposal to connect with your audience, pull them in, and hook them emotionally.
Things to focus on include:
- Image quality
- Music (something simple and generic is best)
- Shots of the product in action
- Members of your team
When producing your video, shoot two different endings: one before the campaign launches, which you can use to promote the campaign before you start, and another for when the campaign is live.
The first ending should invite people to sign up for email updates on your upcoming crowdfunding campaign, and should be posted on social media, your website, forums, and other areas where people can find it 2-6 months before your campaign launches. This will give you lots of lead-time to build an email list, and provides you with a strong piece to convey your message early on.
The second ending should be used when you post your video to the campaign page. This ending should invite people to contribute, re-iterate your pitch, goals, and message, and include a call to action for people to share the campaign on their own social feeds.
Tell Your Story
Tell your story before you ask for money.
In your text and in your video, if you've made one, focus on your story and your enthusiasm for your project. Introduce the members of your team, and let them explain why this project is important to them.
Don't worry too much about being wooden and formal - people like to laugh, and if your story can make them smile, or even laugh, they'll relate to you and your goals much more easily. Your funders want to feel like they can relate to you, and your cause, and being your silly, enthusiastic self will help tremendously.
Explain to your audience why funding your particular project will make them feel good and how they'll see a return on investment, either by being the first to access a new technology or product, supporting an artist they love, or by participating in a large-scale event like relief efforts which will help other people.
Is That It?
Of course not! But that is it for this post. Crowdfunding is a complex and fascinating new way to promote ideas and projects and raise money, and there's a lot more to discuss, but this post is getting a bit long in the tooth and nobody likes walls of text.
With that in mind, stay tuned for pt2 of the Crowdfunding Crash Course recap, coming soon!
This post is part of a series. For all of the Crowdfunding Crash Course interviews and summary posts, visit the Projects section of my site!


